
Stop thinking of STEM as school subjects; the real goal is to teach your child to think like a practical engineer at home.
- The most valuable lesson isn’t finding the right answer, but mastering the process: defining a problem, prototyping a solution, and learning from what doesn’t work.
- Mundane chores like laundry or building with blocks can become powerful lessons in system efficiency and physics when viewed through a problem-solving lens.
Recommendation: Shift your focus from praising a project’s success to celebrating your child’s ability to analyze a failure and iterate on their design. That’s the core of engineering.
You see the headlines about the importance of STEM, and you try. You help with the math homework, you buy the science kits, and you watch the documentaries. Yet, for your child, science and math often remain abstract concepts trapped inside a textbook or a pre-packaged box. The classic word problem—”If a train leaves Chicago at 3 PM…”—feels disconnected from a world where problems are messy, solutions aren’t in the back of the book, and trains are, well, just trains.
Many well-intentioned efforts focus on “fun experiments” like baking soda volcanoes or building LEGO towers. While engaging, these activities often miss the most critical lesson: the underlying methodology of a scientist or engineer. They teach the “what” but not the “how” or, more importantly, the “why.” They show a result, but they don’t teach the structured process of inquiry, prototyping, testing, and iterating that leads to a robust solution.
But what if the key wasn’t to bring more school-like activities into your home, but to reframe your home itself as an engineering lab? The true power of STEM isn’t in memorizing formulas; it’s in developing a logical, curious, and resilient mindset. This is about transforming your role from a tutor to a senior engineer, guiding your child through a repeatable process they can apply to anything—from a squirrel-raided birdfeeder to an inefficient laundry system.
This guide will walk you through that exact process. We will deconstruct the engineering mindset and provide a practical framework for applying it to tangible household challenges. You’ll learn not just to solve problems *with* your child, but to teach them *how* to solve problems for themselves.
Summary: A practical guide to engineering thinking at home
- Why Math Word Problems Fail to Teach Real Application?
- How to Build a Birdfeeder That Actually Survives Squirrels?
- Theory vs. Practice: Why Hands-On Fails Without Reflection?
- The “It Didn’t Work” Mistake: Stopping Before the Iteration Phase
- When to Introduce Coding Concepts: Before or After Reading?
- Why “Just Playing” Is a Myth: The Math Behind Building Blocks
- I Do, We Do, You Do: The 3-Step Method to Teaching Laundry?
- Towers That Fall: How to Teach Gravity and Balance to a 4-Year-Old?
Why Math Word Problems Fail to Teach Real Application?
The traditional math word problem presents a neatly packaged scenario with a single correct answer. This structure inadvertently teaches children that problems are defined by others and that the goal is simply to find a pre-determined solution. Real-world problem-solving, however, starts with ambiguity. It requires one to first identify and define the problem itself, then gather the necessary data. This is a skill that word problems, by their very nature, cannot teach.
Furthermore, this approach disconnects the utility of math from a child’s tangible world. The abstract nature of calculating a train’s speed does little to demonstrate how mathematics can optimize their daily life or solve a frustration they actually experience. This disconnect is a primary reason why many children lose interest in math; they fail to see its purpose. To build genuine STEM literacy, we must shift from solving manufactured problems to applying mathematical tools to authentic, observable challenges within their own environment.
The need for this shift is more than just educational theory; it’s an economic imperative. The U.S. Bureau of Labor Statistics projects a 10.4% growth in STEM jobs between 2023-2033, a rate significantly faster than the average for all occupations. The children who will thrive in this future are not those who can merely solve for ‘x’, but those who can identify where ‘x’ is and what it represents in a complex system. They need to become data collectors and problem-framers, not just equation-solvers.
Instead of relying on worksheets, you can turn your home into a statistics lab. Encourage your child to identify their own mathematical questions. For instance, “How much water does our dripping tap waste in a day?” This transforms them from a passive recipient of a problem to an active investigator. They must decide how to measure the drip rate, execute the data collection, and then perform the calculation. The answer isn’t a grade on a page; it’s a real number with real consequences.
How to Build a Birdfeeder That Actually Survives Squirrels?
Here is a classic household engineering challenge, perfect for an 8-year-old. The goal isn’t just to build a birdfeeder; it’s to build one that meets a specific design constraint: it must be squirrel-proof. This is the perfect opportunity to introduce the Engineering Design Process (EDP), a structured method used by engineers to solve problems. It can be simplified into five core steps for a child: Ask, Imagine, Plan, Create, and Improve.
First, Ask: Why are the current feeders failing? What are the squirrels’ methods of attack? This step is about observation and data collection. You and your child become researchers, watching how squirrels climb, jump, and hang to get to the seeds. Next, Imagine: Brainstorm potential solutions. Don’t filter ideas. A slippery pole? A wobbly dome (baffle)? A feeder that closes under a certain weight? This is the creative phase, where all ideas are valid.
Then comes the Plan phase. Choose one of the brainstormed ideas and sketch it out. What materials will you need? How will the parts connect? This step translates an abstract idea into a concrete blueprint. The Create step is the hands-on building of the prototype based on your plan. The key here is that this is Prototype 1.0, not the final product. As the Wright brothers learned while designing their aircraft, the first prototype is rarely the last. They studied birds, built countless gliders, and learned from each crash before finally achieving flight.
Finally, and most importantly, is the Improve step. Test the birdfeeder. When a squirrel inevitably breaches the defenses, it’s not a failure. It’s a successful data collection event. What worked? What didn’t? How can the design be modified to address the new data? This iterative loop is the heart of engineering. You’re not just building a birdfeeder; you’re teaching a resilient, methodical approach to problem-solving.
Theory vs. Practice: Why Hands-On Fails Without Reflection?
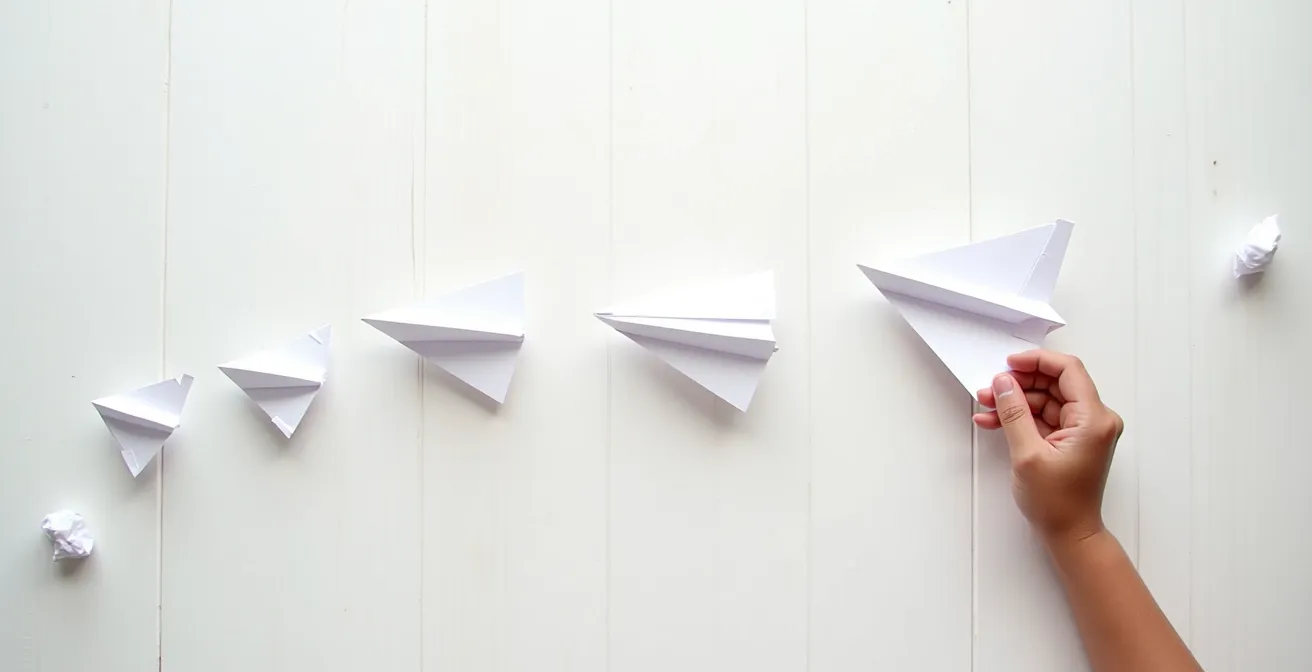
Simply doing a hands-on activity is not enough. A child can build a hundred paper airplanes, but if they don’t stop to analyze why one flew farther than another, they are engaged in an activity, not an engineering exercise. The learning doesn’t happen in the *doing*; it happens in the *thinking about the doing*. This crucial step is called reflection, and it’s what separates a fun craft project from a genuine STEM lesson.
When a project “fails”—the tower collapses, the circuit doesn’t light up—the immediate temptation is to feel frustrated. However, an engineer sees this moment as the most valuable part of the process. The failure provides data. The key is to pause and ask the right questions: Why did it fall? Was the base too narrow? Was the weight distributed unevenly? This metacognitive process of thinking about one’s own thinking is where deep, lasting understanding is forged.
As researcher Michelene Chi outlines in her ICAP framework, the most effective learning is interactive. She states:
Hands-on learning is most effective when it is interactive—where students actively build, create, and collaborate.
– Michelene Chi, ICAP Framework
The “interactive” component implies more than just physical manipulation; it involves interaction with the concepts themselves through questioning and analysis. Studies like the landmark HighScope Perry Preschool Study have long shown the power of this approach, finding that children in hands-on programs demonstrate higher academic achievement and increased lifetime earnings. This success is not merely due to the hands-on nature, but because these programs encourage children to plan their actions and reflect on their outcomes, building the foundations of critical thinking.
Your role as the parent-engineer is to facilitate this reflection. When a project is complete, successful or not, implement a “post-mortem” or a “debrief.” Ask your child: What was the hardest part? What would you do differently next time? What surprised you? These questions guide them from being a simple builder to a reflective designer, transforming a fleeting activity into a permanent mental model.
The “It Didn’t Work” Mistake: Stopping Before the Iteration Phase
The single biggest mistake in teaching STEM at home is treating an initial failure as the end of the project. When a child says, “It didn’t work,” and puts the materials away, a crucial learning opportunity is lost. In the professional world, no engineer expects their first prototype to be perfect. The goal of a first attempt is not to succeed, but to learn enough to make the second attempt better. This is the iteration phase, and it is the engine of all innovation.
You must reframe “failure” for your child. It is not a negative outcome; it is simply a data point. When a paper airplane nosedives, it has successfully provided information about its weight distribution or wing shape. The correct response is not, “Oh, too bad,” but, “Excellent! Now we have data. What does this crash tell us?” This shift in perspective is fundamental to building resilience and a growth mindset.
The engineering design process explicitly embraces this. As described by educators, the method emphasizes that “any failures become a teaching tool and a time for students to reflect, improve, and try again.” There is no single correct solution, only a series of improvements. By stopping after the first attempt, we rob children of the chance to engage in this powerful loop of feedback and refinement.
To put this into practice, plan for iteration from the start. When beginning a project, don’t just gather materials for one attempt; gather enough for three. Frame the project as a challenge with multiple rounds: “Our mission is to build a boat that can hold 20 pennies. This is our first prototype. We’ll test it, see what we learn, and then build version 2.0.” This normalizes the idea that the first try is just a starting point. By celebrating the improvements made between versions, you teach your child to value the process of refinement over the hollow victory of an instant, unearned success.
When to Introduce Coding Concepts: Before or After Reading?
Many parents see coding as a complex, screen-based activity reserved for older children. However, the foundational logic of coding—computational thinking—can and should be introduced long before a child even touches a keyboard. In fact, these concepts are best taught “unplugged” by applying them to physical, everyday tasks. At its core, computational thinking is about breaking down a problem into a logical sequence of steps, which is exactly what an engineer does.
You can introduce these concepts naturally. An algorithm is simply a set of instructions. A recipe is an algorithm. The steps to assemble a toy are an algorithm. A loop is a repeated action; stirring brownie mix 20 times is a loop. A conditional is an “if-then” statement; “IF the floor is dirty, THEN use the vacuum” is a conditional. By using this vocabulary in everyday contexts, you demystify it and connect it to the real world.
This early, unplugged foundation is crucial. While data shows that 60% of public high schools offer foundational computer science, students who arrive with a pre-existing grasp of logical structures have a significant advantage. They have already learned to think systematically. They can “debug” a set of instructions for making toast that fails because a step was missing, or create reusable “functions” like a “Bedtime Routine” that is “called” every night.
By teaching the logic first, you prioritize the thinking process over the tools. When your child eventually sits down to learn a programming language like Python or Scratch, they will not be starting from zero. They will recognize the patterns of loops, conditionals, and sequences because they have already lived them. They will understand that coding is not about magic, but about giving a computer extremely precise instructions—a skill they first honed by telling a parent exactly how to make a peanut butter sandwich, and then laughing as the parent takes their ambiguous instructions literally.
Action plan: Teaching Unplugged Algorithms
- Debug Instructions: Write the ‘algorithm’ for making toast and have your child follow the steps literally to find and fix bugs in the instructions.
- Teach Loops: Use physical repetition for tasks. For example, instruct them to “Stir the brownie mix 20 times” to introduce the concept of a loop.
- Introduce Conditionals: Frame household tasks with conditional logic: “IF the floor is dirty, THEN use the vacuum.”
- Create Functions: Define a set of steps as a reusable ‘function,’ like a ‘Bedtime Routine’ that can be ‘called’ every night.
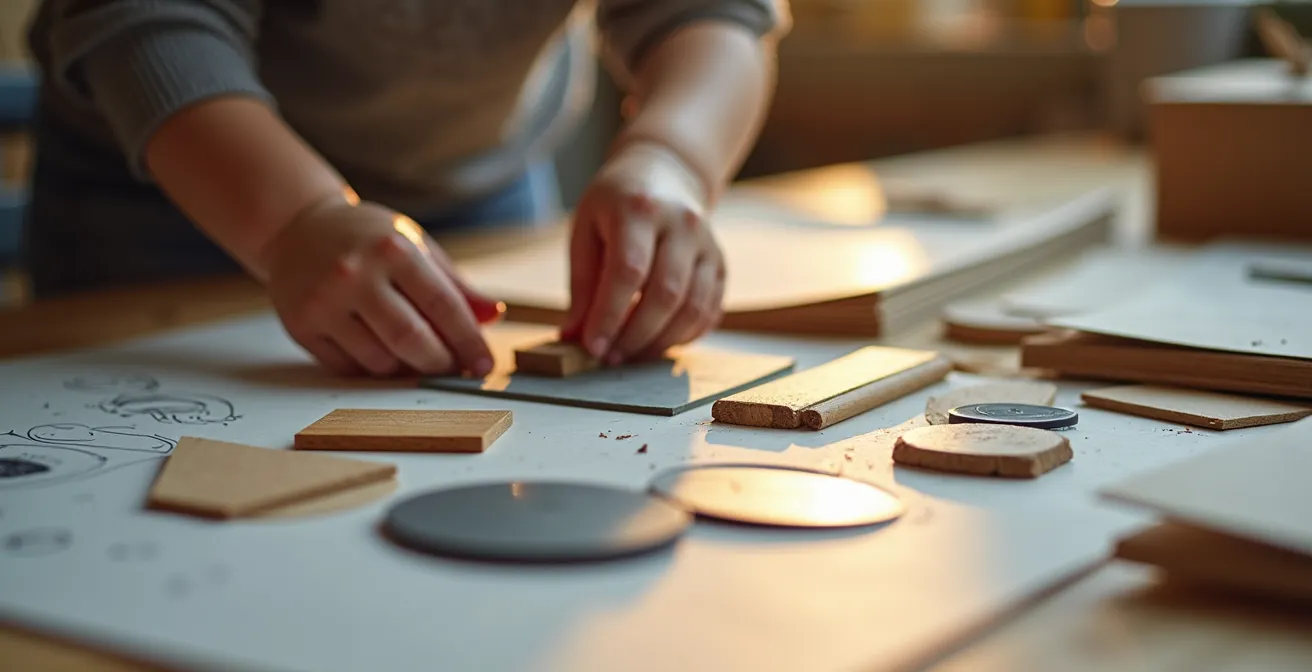
Why “Just Playing” Is a Myth: The Math Behind Building Blocks
To a casual observer, a child building with blocks is “just playing.” To an engineer, they are running a series of complex physics and geometry experiments. Block play is one of the most powerful, hands-on learning tools available, but its true potential is only unlocked when we, as parents, recognize and articulate the STEM principles at work. This isn’t about interrupting play, but about enriching it with observation and questioning.
The importance of these early, playful explorations cannot be overstated. Research consistently shows that among preschool-aged children, math knowledge is a better predictor of later academic achievement than even early reading or attention skills. The spatial reasoning, geometric understanding, and intuitive physics learned from block play form the very foundation of this critical mathematical thinking.
When a child builds a tall tower, they are not just stacking blocks; they are intuitively exploring concepts like center of gravity and structural stability. When the tower falls, it’s a failed experiment that provides data on weight distribution. When they build a bridge between two “cliffs” (couch cushions), they are grappling with load distribution, tension, and compression. Your role is to give them the vocabulary for what they are discovering. You might ask, “I wonder if the tower would be more stable with a wider base?” or “What happens to the bridge if we put more weight in the middle versus on the ends?”
By observing and questioning, you help them move from intuitive discovery to conscious competence. This table breaks down how simple block activities map directly to core engineering concepts:
| Block Activity | Engineering Concept | Learning Outcome |
|---|---|---|
| Building tall towers | Center of gravity, structural stability | Understanding balance and weight distribution |
| Creating bridges | Load distribution, tension and compression | Problem-solving with constraints |
| Pattern building | Spatial reasoning, symmetry | Mathematical thinking and design principles |
I Do, We Do, You Do: The 3-Step Method to Teaching Laundry?
Once you’ve adopted an engineering mindset, how do you effectively transfer it to your child? The “I Do, We Do, You Do” model is a classic pedagogical framework that works perfectly for teaching complex processes, even a seemingly mundane one like laundry. This method allows you to gradually release responsibility, ensuring your child understands the system before they are expected to operate it independently.
Let’s reframe laundry. It’s not a chore; it’s a multi-stage processing system with inputs (dirty clothes), processes (sorting, washing, drying, folding), and outputs (clean, folded clothes). The goal is to optimize this system for efficiency and quality.
Step 1: I Do (You Explain). In this stage, you perform the task while verbalizing the “why” behind each action. This is a lecture, but a hands-on one. You don’t just sort clothes; you explain the concept of multi-criteria classification: “We are sorting not just by color, but also by fabric type and soil level, because different fabrics need different water temperatures.” You explain the chemistry: “This detergent has ‘surfactant’ molecules. One end of the molecule loves water, and the other end loves oil, so it pulls the dirt off our clothes.”
Step 2: We Do (You Collaborate). Here, you work together. This is the lab phase. You might map out the entire laundry system on a whiteboard, from hamper to drawer. Then, you can identify the bottleneck. “It looks like our biggest slowdown is the time it takes to fold everything. How could we improve this part of the process?” You are now co-engineers, analyzing a system and brainstorming optimizations.
Step 3: You Do (They Execute). Finally, your child takes over the process, with you acting as a consultant. They are now the lead engineer. They sort, wash, and dry, applying the principles they’ve learned. If a problem arises—a red sock turns the whites pink—it’s a debugging opportunity. They can trace the error back through the system and create a new rule to prevent it in the future. You have successfully transferred not just a skill, but a problem-solving framework.
Key takeaways
- The goal of at-home STEM is to teach the engineering process (Ask, Imagine, Plan, Create, Improve), not just to complete projects.
- “Failure” is a critical data point. The most important learning happens during the iteration phase when a child analyzes what went wrong and improves their design.
- Computational thinking concepts like algorithms and loops can be taught “unplugged” through everyday chores and activities, building a foundation for future coding skills.
Towers That Fall: How to Teach Gravity and Balance to a 4-Year-Old?
The engineering mindset isn’t just for 8-year-olds. Its core principles can be adapted for much younger children, even preschoolers. The key is to simplify the concepts and focus on concrete, physical experiences. For a 4-year-old, concepts like “gravity” and “center of balance” are abstract, but the *experience* of them is very real. Your job is to connect the word to the feeling.
The best teaching tool is the child’s own body. To explain balance, have them stand on one foot. They will naturally adjust their posture. Then, give them a heavy book to hold and ask them to do it again. They will physically feel their center of gravity shift and will have to compensate differently. You can say, “See how you have to lean to stop from falling? You’re moving your balance point!”
Simple household objects can become powerful physics labs. A ruler balanced on a pencil is a perfect fulcrum to explore equilibrium. Challenge them to find the balancing point of different toys. They will discover that it’s not always in the geometric center. This hands-on exploration provides a wealth of intuitive data. Even at this young age, you can model the “Ask” phase of the engineering process by studying how others have solved similar problems, like looking at pictures of different types of bridges or buildings and talking about why they are shaped the way they are.
You’re not aiming for a deep, theoretical understanding. You are building a library of physical experiences that you can attach vocabulary to. When their block tower inevitably falls, you can say, “Gravity pulled it down!” When they successfully balance a toy car on a narrow ledge, you can say, “You found its perfect balancing point!” You are planting the seeds of scientific curiosity and observation, demonstrating that the physical laws governing their play are the same ones engineers use to build skyscrapers.
Frequently asked questions about Teaching STEM Concepts
How can I teach balance without complex explanations?
Use the child’s own body – have them stand on one foot, then try holding a heavy book to feel how their center of gravity shifts. This makes the concept a physical feeling rather than an abstract idea.
What everyday objects work best for balance experiments?
Use a ruler balanced on a pencil as a fulcrum, then challenge children to find the balancing point of different objects like toys or shoes. This turns a simple game into a physics experiment.
How do I explain stable vs unstable equilibrium to young children?
Show them a pyramid or a wide-based block (stable – it wants to stay upright) versus a pencil balanced on its tip (unstable – it wants to fall). Then, have them find other examples of stable and unstable objects around the house.